Deploying a Node.js Application on AWS EC2 with Nginx and Enabling SSL Certificate


A step-by-step guide on how to deploy a node.js application on AWS and achieve port forwarding using nginx is provided in this article.
Starting out with EC2.
Build an Ubuntu instance.
Connect via SSH to your instance.
Install Dependencies.
Upload your code to the server from GitHub.
Launch your node app using pm2.
Set up nginx to run your app on port 8001
Getting Started with EC2
AWS requires you to create an account and provide them with your card details before allowing you to sign on. Once you are logged into the AWS console, go to the Services section on the top left corner of the page. Select EC2 from the compute section.
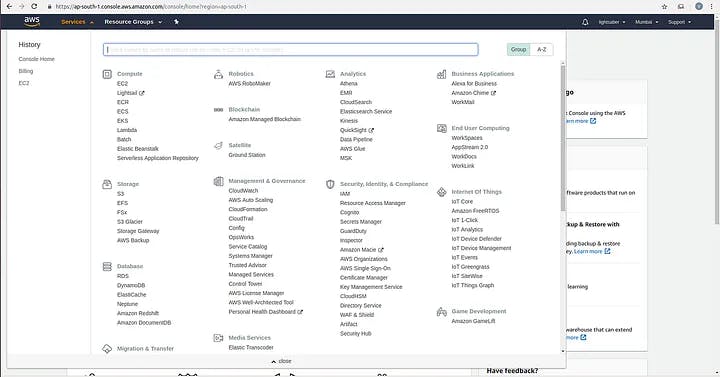
The EC2 dashboard is where you will be taken. By clicking the ‘launch instance’ button, you can choose to create a new EC2 instance.

Create an Ubuntu instance
Click on instances in the Instances section of the EC2 dashboard. A window with a series of steps will open up when you click on ‘Launch Instance’. Ensure that the ‘Free tier only’ option is selected. Choose “Ubuntu Server 22.04 LTS (HVM), SSD Volume Type” from the choices displayed in the image below.

Afterward, you will be asked to select an instance type. The t2.medium instance is the one I will use here.

Create a key pair

The default configuration may be accepted for step 4
In step 5, you have the choice to select security group rules. I will be selecting SSH, HTTP, and HTTPS here. In addition, I selected a custom TCP port 8001. Our Node application will be executed on the 8001 port.
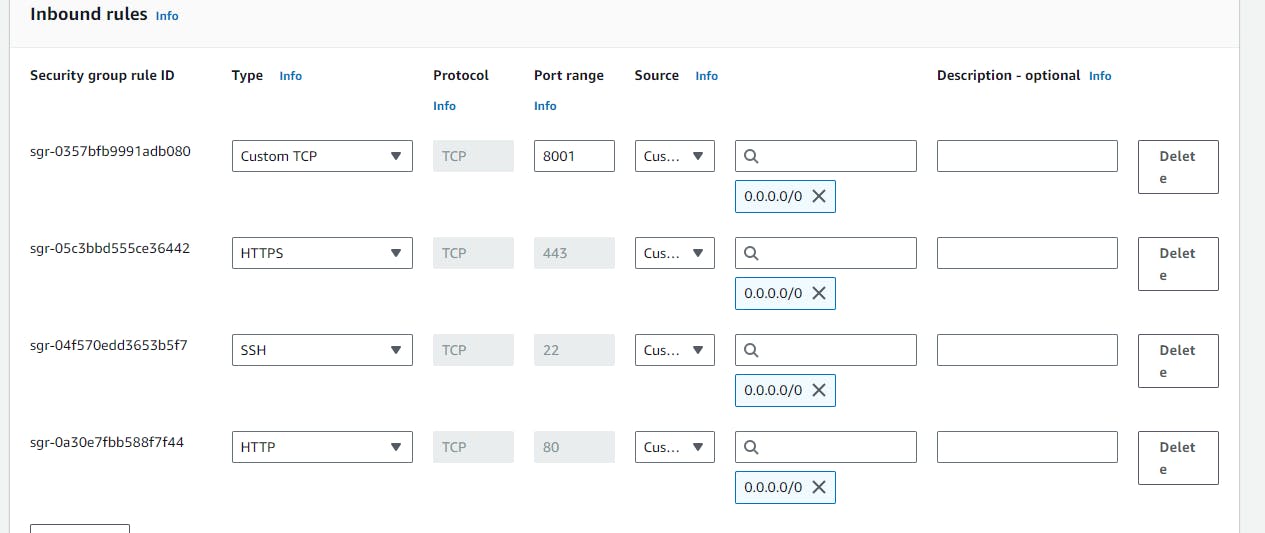
Don’t worry if you mess up, we can change these configurations later.
Once the instance has been created, proceed to ssh into it. The initial thing we need to set up is Node.js itself. To obtain Node in my instance, I will execute the following command.
curl -sL https://deb.nodesource.com/setup_12.x | sudo -E bash -
sudo apt install nodejs

node --version
After the node setup is complete, we can clone our repository and run the code in our cloud instance.
git clone <project_repo>
cd yourproject
npm install
npm start (or whatever your start command)
# stop app
ctrl+C
I am executing my application in the port 8000. We are able to test our application using the public IP address and port. In my opinion, it is http://54.210.195.17:8000/.
, we are going to install a library called pm2 which will keep our node application running in the background. Start your application with PM2 by running the following commands.
sudo npm i pm2 -g
pm2 start app
Our app will commence with this. It is possible to check if the application is running by visiting the IP address and port again.
running in a web browser
Establishing NGNIX and Reverse Proxy
In the next step, we will set up NGNIX and create a reverse proxy. Our application will be redirected to the default port 80 by this. SSL will be added through the NGNIX server as well.
To install NGNIX, we execute the following command:
sudo apt install nginx
Configuring NGNIX to set up a reverse proxy and redirect our application to port 8001 is possible once it is installed. Editing the file below is necessary to do so.
sudo nano /etc/nginx/sites-available/default
server_name himanshurnq-ml.line.pm www.himanshurnq-ml.line.pm;

    location / {
        proxy_pass http://localhost:8001; # your app's port
        proxy_http_version 1.1;
        proxy_set_header Upgrade $http_upgrade;
        proxy_set_header Connection 'upgrade';
        proxy_set_header Host $host;
        proxy_cache_bypass $http_upgrade;
    }
The section in the location makes the changes as shown above. In the event that you are using a custom domain name, go to your DNS provider and add an A Record as shown below.

In the target section, we will add the publicly available IP address of our instance.
After this is completed, return to your terminal and restart NGNIX.
# Restart NGINX
sudo service nginx restart
It’s important to give the custom domain some time to propagate. Once the application is running, you can access it on your custom domain after some time.
SSL encryption is used to secure our site
The only remaining task is to secure our web server with SSL encryption. It’s a breeze to do this using the LetsEncrypt library.
The certbot package is installed by running the following commands first.
sudo add-apt-repository ppa:certbot/certbot
sudo apt-get update
sudo apt-get install python3-certbot-nginx
Upon completion of the installation, we will utilize the Certbot cli to create an SSL certificate for us. In order to generate the SSL certificate, run the following command and provide your email information when prompted.
sudo certbot --nginx -d yourdomain.com -d yourdomain.com

When the certificate is generated, you must log into your application through HTTPS.
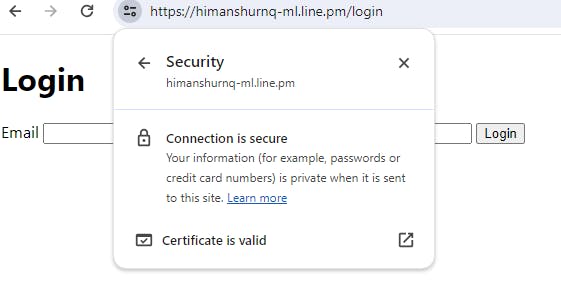
That’s all! The deployment of your NodeJS application on an AWS EC2 instance has been successful. Exploring the dashboard of your newly deployed application without hesitation is not a bad idea.